Showing posts with label craft. Show all posts

Friday, 7 June 2013

Craft: Crochet Ice Cream Cones

I haven't had a lot of time for crafts and blogging lately as uni has been taking up some of my time in the evenings. My shawl (that I wrote about last week) hasn't grown very much and I needed a small crochet project to get me motivated to keep working on it. That's how these crochet ice creams came to be!  


Wednesday, 29 May 2013

Craft: Work-in-Progress Hilo Shawl

I have a wedding to go to in mid July and it's presented a bit of challenge in terms of what to wear. The ceremony will be outside if all goes according to plan and it's likely to be cold (I'm in Australia so it will be the middle of winter). I've found it really difficult to find a nice dress with long enough sleeves to keep me warm. In the end I gave up and bought this cute dress from ModCloth. It has no sleeves at all, I'm going to be freezing!

Friday, 24 May 2013

Craft: Crochet Bunny and Invisible Decreases

I've been crocheting amigurumi for several years now and it's taken me this long to learn that there is such a thing as an invisible single crochet decrease! 

Made with invisible decreases!

Sunday, 12 May 2013

Craft: Mother's Day Granny Stitch Scarf

I hope everyone had a great Mother's Day! 

My Mum has admired the granny stitch scarf I have been working on several times now and I thought a similar scarf would make a perfect Mother's Day present. I couldn't give Mum the one I was working on of course, which only left me with ten days to make another one. I have been crocheting it at every spare moment to get it done in time. Luckily granny stitch is relaxing and easy to do while reading or watching TV and I managed to get the scarf finished with one day to spare! 


Wednesday, 1 May 2013

Craft: Work-in-Progress - Granny Stripe Scarf

It seems like I've been waiting all summer for the weather to cool down so that I can start wearing scarves again. Now that it finally has I've begun crocheting my first scarf!


I was inspired to make the scarf after finding the yarn. I don't normally like novelty yarn, but this one was hard to resist with its tiny sequins and rich colour. In certain lights the yarn looks deep red and in others its almost a bright pink.


Monday, 22 April 2013

Craft: Experimenting with Craft Photography

For a while now I've been wanting to improve the pictures of my craft projects. I really admire some of the craft photography on blogs like Monsters Toy Box and Fresh Stitches. I came across this post from Caught on a Whim which details Erica's process for taking pictures for her blog. She makes it look so simple and uses very basic equipment - a low table, two pieces of foam board and a camera (she also recommends a furry assistant!). I found some foam board in a craft shop last weekend and set up a trial photo shoot. Unfortunately it was too late for natural light but I gave it a go anyway.

For subjects I used these cute tiny chickens that I have been knitting up for the Mochi Mochi photo competition. The pattern is from the Teeny Tiny Mochi Mochi book which I have previously raved about.


I decided to try experimenting with some bigger toys....


And then this happened... the background somehow disappeared...


I almost managed to take a picture with no visible background, replicating the pictures I like from other craft blogs. I have no idea what caused this to happen, but it was easier to get the effect if I took the picture from an angle where the vertical board couldn't be seen at all. These photos may be far from perfect but they have definitely inspired me to keep trying :-)


Monday, 15 April 2013

Craft: More Card Making

A few weeks ago I posted about a Stampin' Up card making class I went to and I liked it so much I went back for another class. In this class we made three cards which were slightly more involved than the cards and labels I made in the first class.

Here is a Mother's Day card that I made first. 


I really love the bright colours in this one. It was the simplest of the three cards to make. The only techniques involved were stamping and gluing! 

This next one is also a Mother's Day card. For this one I had to emboss the paper after it had been stamped using Stampin' Up's "Big Shot" machine. I actually got this completely wrong and got the embossed pattern on the wrong side of the card. I did the embossing on the right side and you can hardly tell... in the photo at least :-P


The third and final card is definitely my favourite. I think it's too somber for a Mother's Day card so I decided not to put a sentiment on it. The stamp in the middle is done with an interesting mirroring technique. Basically you stamp onto a piece of acetate or something similar that the ink isn't going to be absorbed by, and quickly transfer the mirror image from the acetate to the paper below. 

Another cool effect used in the card is the "paper stretching" technique, which is a way to create a border with shapes that are the same size - like the main image in this card and the black outline behind it. This is a lot simpler than it sounds (I was disappointed that there wasn't any stretching involved). The black outline started out the same size as the white piece in front of it. To "stretch" it you cut the paper in half down the middle, from point to point, and position the two halves out the sides of the main piece. In this case the black pointy tips stuck up at the top of the white piece and had to be cut off. 


Like the last class I didn't design any of these cards. I'm not sure if they were designed by Stampin' Up or the class instructor. Whoever designed them, they are pretty cute and I'm glad I'm now prepared with cards for Mother's Day!

Monday, 8 April 2013

Craft: Fresh Stitches Scrap Along


Do you have lots of balls of yarn that are too small to make anything with, but are too large to justify throwing away? If you do, the FreshStitches website has the answer! 

Scrap-a-long

This month FreshStitches is hosting a scrap-along; a crochet-along using all your leftover bits of yarn. The idea is to create a "magic ball" using yarn scraps to create a colourful skein. FreshStitches has a post explaining how to join the different scraps together to create the magic ball. Here's the one I made. 

(The paper clip is my stitch marker!) 

It was fun crocheting with the "magic ball" and seeing all the different yarns come together in the finished piece. It was also nice crocheting with different types of yarn again. Lately I've been buying fairly cheap wool for making amigurumi, but some of my scrap yarn was from my days of knitting clothes for myself using fancy wool/cotton blends. 

I chose to make this cute monster for my scrap-along project. The pattern is called Lark. It's a FreshStitches pattern that is published on the KnittingFever website (this might disqualify it from the FreshStitches competition...oops!).  It was really fast to crochet and the pattern was nice and easy to follow. I like the funny oversized eyes! 


If you're not familiar with FreshStitches patterns you'll notice the texture of her patterns are different to most amigurumi. This really confused me the first time I saw it - I actually wondered if I had been crocheting wrong all this time! Now that I've made one of FreshStitches patterns I realise it's because the whole piece has been crocheted in the back loops. It does give a nice texture.

Here are some more pics of my scrappy monster.


Saturday, 9 March 2013

Craft: Card Making

Since starting this blog I've wanted to expand my crafting horizons and last week I had a chance to try card making. I was invited to a Stampin' Up party by a friend and it turned out to be a lot of fun. I was expecting something like a Tupperware party where I'd be pressured into spending lots of money on pretty things I don't really need. Happily it was more of a craft workshop and I didn't feel obliged to buy anything (although I did of course :-P). 

At the class the participants were given supplies and guidance to make five projects. Here's what we got to make:


A "celebrate" card using embossed card and stamps. 

An Easter card. The stamp is coloured in with a water colour pen.

A butterfly tag using a butterfly hole punch and stamps.

And a cute dressed up Easter egg using stamps and a cut up flower punch for wings.

I also made a birthday tag but I gave it away before I had a chance to take photos!

I was really impressed with the class and all the pretty things that we got to make. None of the designs are my own, but I can see how it would be easy to make lots of lovely cards and tags with the right equipment. Unfortunately a lot of the equipment is fairly pricey; the machine used for embossing card costs over $100! Card making probably won't become the primary craft in my life, but it was nice to try something new. And who knows, I might give it a try once in a while now that I know how :-)


Tuesday, 26 February 2013

Craft: Crochet Cats

In my post last week I mentioned that I wanted to make my Mum a crocheted cat for her birthday. I only started it a week beforehand, but I'm happy to say that I finished it in time! It wasn't easy however. Last week was a busy one for me as I've been preparing for a housemate to move in. This didn't leave a lot of time for crocheting cats! In addition to that I decided that the first pattern I made wasn't really right for Mum....

I made the Amineko cat pattern first. There's nothing wrong with the pattern. In fact it's a great pattern - I smile every time I see the kitty snoozing amongst the pillows on my sofa.


Or on top of the sofa.


Or on the bookshelf.


Even up a tree!


I thought he might be a bit too cartoonish for Mum. He's more cheeky than cute. Perhaps I just didn't want to let him go :-P

I decided to quickly crochet an alternative cat for Mum. I made this kitty.


The pattern is my own modification of the Spring Bunnies pattern from All About Ami. I'll post the modifications to the pattern soon. I'm glad I decided to make the second crochet kitty for Mum because not only do I get to keep the Amineko kitty for myself, the white kitty looks likes like my Mum's ragdoll William who has recently been shaved for the summer!


Wednesday, 6 February 2013

Craft: Ami Ami Dogs

Have you heard of Ami Ami Dogs? It's some of the cutest crochet I've ever seen! I have both of Mitsuki Hoshi's Ami Ami Dogs books and it makes me happy every time I flip through the pages and admire her adorable creations.

Unfortunately Ami Ami Dogs are not so easy to replicate. The first obstacle is the way the patterns are written; in charts. If like me you've never tried crocheting from a chart it might take some getting used to. I find it easy to miss an increase on decrease in the charts and would much prefer a written pattern. I will endure the charts for the cute Ami Ami dogs however.

The second obstacle is in the making up. It's easy enough to make the component pieces of an Ami Ami dog - it's very basic crochet. Putting the pieces together is another story however... I wanted to make the Shih Tzu pattern from Ami Ami Dogs 2 for a friend. Here's how it looks in the book:


See, completely adorable!

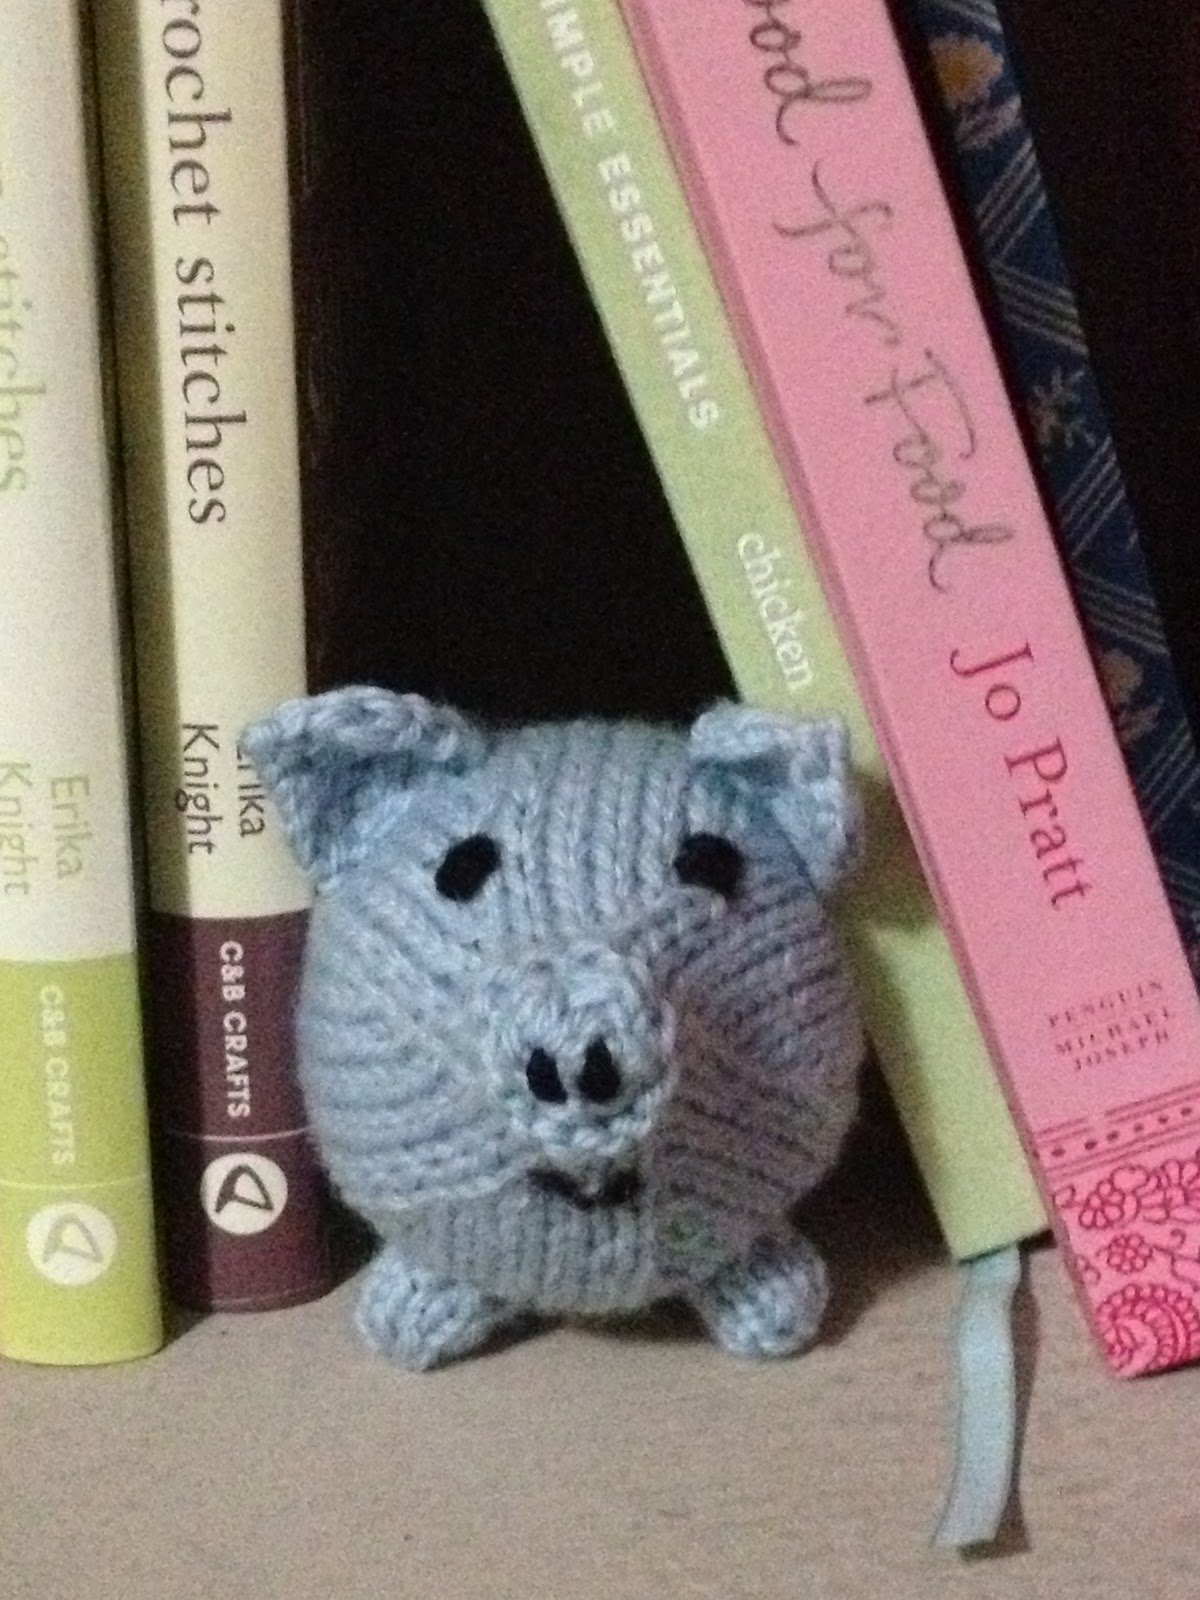
And here's my attempt....


A lot less adorable :-P He's still cute, but there's something not quite right about the way he's put together. I think Mitsuki Hoshi must put a lot of care and attention into putting her puppies together. I have made mine in a much larger size than what's recommended in the book and maybe that has something to do with it.


He does have a certain charm! And he was well liked by his new owner. 

The yellow dog is my first attempt at an Ami Ami Dog. I will be trying at least one more pattern from the book (the jack russell next time). It's worth having a look at the Ami Ami Dogs books - even if you don't crochet! - they are so full of cuteness and charm it's almost ridiculous!

Sunday, 9 September 2012

Crochet Penguin

Yesterday I finished making this super cute penguin pattern from All About Ami. I started this ages ago when Sophie started hers (published in her last post), but I've been seriously distracted by the launch of Guild Wars 2 and have sadly abandoned my crafty pursuits for the last few months. Hopefully finishing the penguin will keep me motivated for a while.


I'm really happy with my penguin. He looks super snugly with his over-sized scarf. I had to change the size of the body as I started to run out of blue yarn. I kept the sizes of the arms and scarf that same (because I had forgotten that I changed the body size!). I think it works though.

This is a great pattern and I recommend having a look at All About Ami; the blog has some really cute patterns. She's even got a pattern for Link which I really have to try some time!  

Thursday, 30 August 2012

A Penguin for Penelope

We welcomed my new niece, Penelope Joy, into the world a month ago. She's super cute and she actually sleeps - who knew that some babies actually sleep? I would never have guessed it.

I wanted to make something special for her. I've been crocheting baby rugs for a few years now, but I decided it was time to go all out: it was time to learn how to crochet a toy.

Happily, I had Emily to teach me the stitches I needed, and to explain how to follow patterns. I don't know how I would have done it without her! She even found me an easy pattern to try: gorgeous Snuggles the Penguin from All About Ami. There are a few toy patterns on this blog that are definitely on the to-do list now :-)


My penguin isn't perfect, but I think he's pretty great for a first timer!

I changed the pattern a little bit by using a 4mm hook and 8ply yarn, instead of a 2mm hook and 4ply yarn. The penguin feels like a good size and weight to me - after all, there'll be a baby chewing on him and throwing him around the nursery soon enough, so he needs to have a little bit of heft to him.


My favourite childhood toys were all crocheted by my Grandma, and it makes me so happy that I can now crochet toys for my nieces and nephews.

Thursday, 29 March 2012

Craft: Knitted Pig a.k.a the "Pig-Mouse"

Pig-mice are small, mouse sized pigs who make their homes in bookshelves. I spotted this one between the knitting and cooking section.


 And again by the science fiction.


The pattern is from Spud and Chloe. It's actually an extremely cute flying pig. I've made the pattern three times and my attempts always come out slightly mousey - not that that's a bad thing exactly. Even when knitted in a more pig like colour, the effect is the same. I think it's the placement of the legs that make my pigs have pointy noises and therefore mouseyness! Regardless of whether it's a pig, a mouse or something in between, the results are still cute and it's a very easy pattern that can be made in a day if you're dedicated. Pig-mice make good last minute presents too.


Who wouldn't want to spy one of these little guys on their bookshelf??


My Current Project: Baby Blanket

I've finished the baby blanket for my colleague, Aleesha, just in time (it's her last day tomorrow!).


This is a terrible photo, but I hope you can see how soft and muted the colours are. I'm very pleased with how the colour scheme worked out.

Saturday, 24 March 2012

Craft: Knitted Turtle

This is my newest friend, Sheldon the turtle. Poor Sheldon is a little bewildered by the outside world.


There are tasty things to eat out there...
... but things can go horribly wrong!
It's much better to stay safe inside with his friends.

The pattern comes from Ruth Homrighaus and is available for free on Knitty. This is one of the more challenging toy patterns I've made. Sheldon and his shell are two separate pieces. The shell can theoretically be taken off and washed separately, but I'm not confident that this will work for my Sheldon and he'll be happier if I don't try!

The pattern is fairly simple to follow until it comes to joining the parts of the shell together. If you're like me and tend to rush into a pattern without reading to the end first, you might find yourself having trouble with this step too. It took me several reads to realise that when crocheting around the shell attachment panel, the aim is to create four opening for the legs to poke through. You don't need to create an opening for the neck like I originally thought. This is done when you join the panel to the shell itself. And don't be tempted to skip the I-cord because this really brings Sheldon together and stops the shell from having slightly pointy corners.
I'd recommend this pattern to anyone who's mastered the basics of knitted toy construction. There are several techniques (I-cord and crochet) that would possibly make Sheldon a challenge for a beginner.