

Friday, 4 May 2012

Thursday, 3 May 2012
Anzac Cookies
I made these Anzac cookies last week when I had a few friends coming around for dinner. I love cooking for my loved ones, but it's never anything fancy! I make Mum-food - the kind of food you can imagine a kind, slightly nutty middle-aged mother making. Instead it's a mostly kind, very nutty young nerd cooking these meals, but at least I'll be really great at baking by the time I am a middle-aged Mum. Right?

This recipe was passed on to me by one of my aunts - a very good aunt, in fact - who found it in the 1943 Willow Cookbook. Yep, 1943. Turns out in those days, the ingredients for baking must have been a lot less varied and interesting. I base this on the slightly disturbing lack of specificity in the recipe: it just says "flour" and "sugar", not which kinds! It took a little bit of trial and error but eventually I figured out how to make the recipe work.
Ingredients:
1 cup plain flour
1 cup brown sugar
1 cup rolled oats
1 cup dessicated coconut
90g butter
1 tablespoon golden syrup
1 teaspoon bicarb soda / baking soda
2 tablespoons boiling water
Sift flour and sugar into large bowl, mix in oats and coconut. Melt butter and add to boiling water. Mix golden syrup and bicarb soda into the butter mix.
Combine wet and dry ingredients, mix well.
Use about one teaspoon of mix for each cookie, drop onto baking paper on tray and bake for about ten minutes or until golden brown.
These are definitely the chewy kind of Anzac cookies. They have a sweet, almost nutty flavour and the oats and coconut give them a more interesting texture than most cookies.
The mix makes about fifty cookies so it's great when you have a whole heap of people coming over, or if you're bringing them to a party. It's too many to just have in the house (trust me, you won't be able to stop yourself from eating them all) but they do freeze well.

This recipe was passed on to me by one of my aunts - a very good aunt, in fact - who found it in the 1943 Willow Cookbook. Yep, 1943. Turns out in those days, the ingredients for baking must have been a lot less varied and interesting. I base this on the slightly disturbing lack of specificity in the recipe: it just says "flour" and "sugar", not which kinds! It took a little bit of trial and error but eventually I figured out how to make the recipe work.
Ingredients:
1 cup plain flour
1 cup brown sugar
1 cup rolled oats
1 cup dessicated coconut
90g butter
1 tablespoon golden syrup
1 teaspoon bicarb soda / baking soda
2 tablespoons boiling water
Sift flour and sugar into large bowl, mix in oats and coconut. Melt butter and add to boiling water. Mix golden syrup and bicarb soda into the butter mix.
Combine wet and dry ingredients, mix well.
Use about one teaspoon of mix for each cookie, drop onto baking paper on tray and bake for about ten minutes or until golden brown.
These are definitely the chewy kind of Anzac cookies. They have a sweet, almost nutty flavour and the oats and coconut give them a more interesting texture than most cookies.
The mix makes about fifty cookies so it's great when you have a whole heap of people coming over, or if you're bringing them to a party. It's too many to just have in the house (trust me, you won't be able to stop yourself from eating them all) but they do freeze well.
Wednesday, 2 May 2012
Cinnamon Cookies
I really wanted to use my cookie cutters today... But not on a boring old recipe I've made over and over. I needed a new cookie recipe! A quick search on Taste turned up these Honey and Cinnamon Christmas Trees, which looked perfect.
Unfortunately my dough was too soft to be a "roll and cut" style of cookie. I wonder if there should have been more flour in my mixture? Anyway, I decided they would be very cute baked as round, plump cookies with icing drizzled on top.

They taste pretty great, too! I modified the recipe slightly by substituting golden syrup for honey (because golden syrup is wonderful), increasing the amount of cinnamon to one full teaspoon and adding in about a quarter of a teaspoon of vanilla bean paste. The icing is just icing sugar, water and a tiny bit of food colouring.
Unfortunately my dough was too soft to be a "roll and cut" style of cookie. I wonder if there should have been more flour in my mixture? Anyway, I decided they would be very cute baked as round, plump cookies with icing drizzled on top.

They taste pretty great, too! I modified the recipe slightly by substituting golden syrup for honey (because golden syrup is wonderful), increasing the amount of cinnamon to one full teaspoon and adding in about a quarter of a teaspoon of vanilla bean paste. The icing is just icing sugar, water and a tiny bit of food colouring.
Friday, 27 April 2012
Gardening Without Breaking the Bank
If I could have a massive garden that took hours and hours of work and cost me an absolute packet, I would. But I've adjusted to my circumstances. A small balcony that gets almost no sunlight is all the space I have to work with, and the Sophie-wages wouldn't cover the kind of gardening spending habit I'd love to have (hello, acres of roses). Between full time work and post-graduate study, I probably don't have time to maintain a massive and exotic garden just now anyway.
My limited experience creating and maintaining my balcony garden has taught me a few things about what to do and what NOT to do if you don't want to waste time, energy and money but you want great results.
Learn the limitations of your space.
As stated above, my balcony gets very little sunlight. Your garden space might get hot sun all day, or no sun at all. It might have sandy soil or rich, dark dirt. You might live in a dry area or one with plenty of rainfall. Think about these factors: they matter.
Choose plants that match your space.
Boy, did I get this wrong. I killed miniature roses, petunias, pansies, gerberas, tomatoes, salad leaves, all kinds of herbs, portulacas, cordylines, flax, and about twenty other kinds of plants before I realised that my choices were all wrong for my space. I wasted about $300 on plants that were never going to survive in the environment I had available. Some day I'll have a wonderful vegetable patch, herb garden and more rose bushes than you could imagine, but it's not going to happen on my balcony. Now I grow ficus, calanchoes, rhea, philodendrons, and even a small umbrella tree, amongst other things.
Phone a friend.
Unless you're already a gardening expert, there's bound to be someone in your life who knows more about plants than you do. I finally caved in and asked my Dad for help after several rounds of "oh gosh all my plants are dead" and he was a huge help! If you don't have someone to ask, ask the internets. Googling "shade tolerant plants" is a fantastic way to find endless resources on your particular gardening issue.
Start small.
Don't go out and buy enough plants for your whole garden. You have no guarantee that you'll still be interested in gardening a month or a year from now, or that the plants you pick will be right for your space (even if you've done your research). It's a bit like borrowing your neighbour's dog for a week to teach your kids about the responsibility of pet ownership. If you can keep your first selection of plants alive for more than three months, it's time to buy a few more. Take it slow. Nature will still be there once you're sure you won't forget to water the roses.
Don't buy at the usual places.
Large plastic pots with good drainage cost about $20 each from Bunnings, or $3.50 each from the Reject Shop. Plants are far cheaper bought from wholesale nurseries, market gardens and community plant sales than from a retail nursery.
Get creative.
I bought the wrong kind of pots initially - no drainage! One of my aunts took one look at the pots and asked why I didn't just use a hammer and nail to knock drainage holes in the bottom of the pots. Duh. I use stools and mini-shelves I already owned to stand pots on at different heights for the look I was after on my balcony. Think outside the square and your garden will be even more unique.
My limited experience creating and maintaining my balcony garden has taught me a few things about what to do and what NOT to do if you don't want to waste time, energy and money but you want great results.
Learn the limitations of your space.
As stated above, my balcony gets very little sunlight. Your garden space might get hot sun all day, or no sun at all. It might have sandy soil or rich, dark dirt. You might live in a dry area or one with plenty of rainfall. Think about these factors: they matter.
Choose plants that match your space.
Boy, did I get this wrong. I killed miniature roses, petunias, pansies, gerberas, tomatoes, salad leaves, all kinds of herbs, portulacas, cordylines, flax, and about twenty other kinds of plants before I realised that my choices were all wrong for my space. I wasted about $300 on plants that were never going to survive in the environment I had available. Some day I'll have a wonderful vegetable patch, herb garden and more rose bushes than you could imagine, but it's not going to happen on my balcony. Now I grow ficus, calanchoes, rhea, philodendrons, and even a small umbrella tree, amongst other things.
Phone a friend.
Unless you're already a gardening expert, there's bound to be someone in your life who knows more about plants than you do. I finally caved in and asked my Dad for help after several rounds of "oh gosh all my plants are dead" and he was a huge help! If you don't have someone to ask, ask the internets. Googling "shade tolerant plants" is a fantastic way to find endless resources on your particular gardening issue.
Start small.
Don't go out and buy enough plants for your whole garden. You have no guarantee that you'll still be interested in gardening a month or a year from now, or that the plants you pick will be right for your space (even if you've done your research). It's a bit like borrowing your neighbour's dog for a week to teach your kids about the responsibility of pet ownership. If you can keep your first selection of plants alive for more than three months, it's time to buy a few more. Take it slow. Nature will still be there once you're sure you won't forget to water the roses.
Don't buy at the usual places.
Large plastic pots with good drainage cost about $20 each from Bunnings, or $3.50 each from the Reject Shop. Plants are far cheaper bought from wholesale nurseries, market gardens and community plant sales than from a retail nursery.
Get creative.
I bought the wrong kind of pots initially - no drainage! One of my aunts took one look at the pots and asked why I didn't just use a hammer and nail to knock drainage holes in the bottom of the pots. Duh. I use stools and mini-shelves I already owned to stand pots on at different heights for the look I was after on my balcony. Think outside the square and your garden will be even more unique.
Friday, 20 April 2012
Saving on Groceries
I've recently cut my weekly grocery bill from $250 to $150... Which is still relatively high for a two-person household! I've got some work to do to get it lower, but I thought I'd share the ways I've cut it down by 40% so far.
I cook. A lot.
It's much cheaper to cook a meal at home than to buy take-away. Everyone knows that. We always cooked most of the meals we eat, but I've upped the ante lately. It would be rare for us to have take-away more than once a fortnight at the very most now. I cook tasty, reasonably nutritious meals at home, and I think it's improving our health as well as the grocery bill.
I plan every meal for the week, without exception.
This requires a little bit of work - but I enjoy it! I plan breakfast, lunch, dinner and snacks for two people for the whole week. This means that you won't be running out of food and running out to a fast food place / the supermarket as a result. Or, much more of an issue for me, buying twice as much food as you really need because you overestimate how much you'll eat.
I audit the pantry.
A tidy pantry is an absolute must unless you want to spend a fortune on ingredients you already have on hand, or fail to buy them because you haven't realised that the packet of icing sugar in the back of the cupboard is two years past its use-by date. Before I write the menu for the next week I check what we have and I often base meals around what we have available.
I only shop once a week.
Every time you go to the supermarket, you pick up a few things that aren't on your list. The less frequently you shop, the fewer "extras" you'll be buying.
I make more things from "scratch" at home.
Okay, tipping some bread mix into the bread maker isn't really cooking from scratch, is it? But I get the same super fresh, delicious loaf of multigrain bread as I'd buy at the bakery for $5 minimum... And it's only cost me $2 for the breadmix and yeast, plus minimal costs for water and electricity. I could buy bread cheaper than that, but it wouldn't be anywhere near the same quality. I make pizza dough in the bread maker too - it tastes better than shop-bought pizza bases and it's cheaper. At Christmas time I used the bread maker to make jam for my family. I haven't discovered all the functions yet but that machine has well and truly won a place in my heart.
We cook large batches.
I only have a relatively small fridge and freezer, but even so it's possible to cook meals in large batches and freeze them for later. Chilli con carne? That can be burritos one week, quesadillas the next and tacos the week after that. Perfect Boyfriend's bolognese sauce can keep me happy for weeks with small serves dragged out of the freezer and warmed for dinner on a cold night.
I only buy what I'll actually eat.
This has been a real issue for me in the past. I eat something once and love it, so I think I'll suddenly start eating it every day. Nope. It just goes to waste.
I need very few cleaning products now that I'm on board the Enjo train.
I'm sure I'll discuss this in greater detail in another post, but if you've been buying as many bottles of shower cleaner as I used to, you'll understand that not buying cleaning chemicals or paper towels is fantastic for the wallet. I wish I'd invested in long-life cleaning materials sooner.
None of these improvements has resulted in a lower standard of living in my little household- if anything, it's been the opposite. And I feel great about not wasting as much food as I once did.
I cook. A lot.
It's much cheaper to cook a meal at home than to buy take-away. Everyone knows that. We always cooked most of the meals we eat, but I've upped the ante lately. It would be rare for us to have take-away more than once a fortnight at the very most now. I cook tasty, reasonably nutritious meals at home, and I think it's improving our health as well as the grocery bill.
I plan every meal for the week, without exception.
This requires a little bit of work - but I enjoy it! I plan breakfast, lunch, dinner and snacks for two people for the whole week. This means that you won't be running out of food and running out to a fast food place / the supermarket as a result. Or, much more of an issue for me, buying twice as much food as you really need because you overestimate how much you'll eat.
I audit the pantry.
A tidy pantry is an absolute must unless you want to spend a fortune on ingredients you already have on hand, or fail to buy them because you haven't realised that the packet of icing sugar in the back of the cupboard is two years past its use-by date. Before I write the menu for the next week I check what we have and I often base meals around what we have available.
I only shop once a week.
Every time you go to the supermarket, you pick up a few things that aren't on your list. The less frequently you shop, the fewer "extras" you'll be buying.
I make more things from "scratch" at home.
Okay, tipping some bread mix into the bread maker isn't really cooking from scratch, is it? But I get the same super fresh, delicious loaf of multigrain bread as I'd buy at the bakery for $5 minimum... And it's only cost me $2 for the breadmix and yeast, plus minimal costs for water and electricity. I could buy bread cheaper than that, but it wouldn't be anywhere near the same quality. I make pizza dough in the bread maker too - it tastes better than shop-bought pizza bases and it's cheaper. At Christmas time I used the bread maker to make jam for my family. I haven't discovered all the functions yet but that machine has well and truly won a place in my heart.
We cook large batches.
I only have a relatively small fridge and freezer, but even so it's possible to cook meals in large batches and freeze them for later. Chilli con carne? That can be burritos one week, quesadillas the next and tacos the week after that. Perfect Boyfriend's bolognese sauce can keep me happy for weeks with small serves dragged out of the freezer and warmed for dinner on a cold night.
I only buy what I'll actually eat.
This has been a real issue for me in the past. I eat something once and love it, so I think I'll suddenly start eating it every day. Nope. It just goes to waste.
I need very few cleaning products now that I'm on board the Enjo train.
I'm sure I'll discuss this in greater detail in another post, but if you've been buying as many bottles of shower cleaner as I used to, you'll understand that not buying cleaning chemicals or paper towels is fantastic for the wallet. I wish I'd invested in long-life cleaning materials sooner.
None of these improvements has resulted in a lower standard of living in my little household- if anything, it's been the opposite. And I feel great about not wasting as much food as I once did.
Monday, 16 April 2012
Tonight's Dinner: Bacon, Zucchini and Asparagus Pasta
I'm always on the lookout for tasty and easy dinners. One of my recent finds is this bacon, zucchini and asparagus pasta.
It's not exactly healthy, but it does contain a lot of vegetables and makes good leftovers for lunch the next day.

Zucchini is currently my favourite vegetable, I can't get enough of it! The secret ingredient in this recipe however is the anchovies. I know anchovies are an acquired taste, but they are amazing in something like this. They melt away and leave an intense salty flavour that soaks into the vegetables. Yum!

The sauce will taste very strong before the pasta is added. The lemon juice and cream cheese help to balance the anchovies.

The pasta is definitely worth trying if you like anchovies. If you don't, the pasta is probably (almost) as good without them.
Hmmm I really need to work on my food photography... and iron my tea towels apparently!
Saturday, 14 April 2012
Hot Cross Buns and Easter Fudge
Easter was fairly quiet this year giving me a chance to spend some quality time in the kitchen.
After reading Sophie's post I was inspired to give hot cross buns a go. I used a recipe from Taste.com, which was easy enough to follow. I've never attempted to bake anything with yeast before, but it was surprisingly simple. Mix yeast, sugar and milk, wait ten minutes... Add wet ingredients to dry ingredients, knead dough, wait two hours... form buns and put into baking tray, wait another hour... Simple enough, but with LOTS of waiting.
Still, the wait was worth it. Seeing how much the buns had risen was very rewarding.
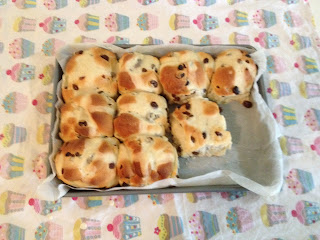
Taking them out of the oven and eating them was even better!
I had the same problem as Sophie with the crosses however. According to my baker brother, it's because I was using the wrong flour. He recommended rice flour. I will have to investigate this next time.
In between waiting for the hot cross buns to rise, I also made Easter fudge. Fudge at Easter is a tradition in my family. My Nana makes it, my Mum makes it and as of this year, I make it. My family prefers a crumbly fudge (which I think is called Scottish tablet ) but my previous attempts to make it have not gone well. It requires a level of precision that I don't seem to have and can easily burn. So instead I make cheat's fudge. I've unfortunately lost the original recipe and I can no longer find it on the internet... luckily it's easy enough to remember.
Add two blocks of chocolate (I used dark chocolate but you can use a mix of milk and dark), a can of condensed milk, about 30 grams of butter and a pinch of salt to a pot.

Stir until melted and combined, then remove from heat. Add tasty extras like macadamias, pistachios, dried fruit, etc. Pour into a lined baking tray. Allow to cool slightly and then refrigerate for at least three hours.

This fudge has a smooth, creamy texture which is quite different from traditional fudge. The results seem like they require a lot more effort then they really do - especially when you dress it up like this.

If you have a sweet tooth, this recipe is definitely worth a try!
After reading Sophie's post I was inspired to give hot cross buns a go. I used a recipe from Taste.com, which was easy enough to follow. I've never attempted to bake anything with yeast before, but it was surprisingly simple. Mix yeast, sugar and milk, wait ten minutes... Add wet ingredients to dry ingredients, knead dough, wait two hours... form buns and put into baking tray, wait another hour... Simple enough, but with LOTS of waiting.
Still, the wait was worth it. Seeing how much the buns had risen was very rewarding.
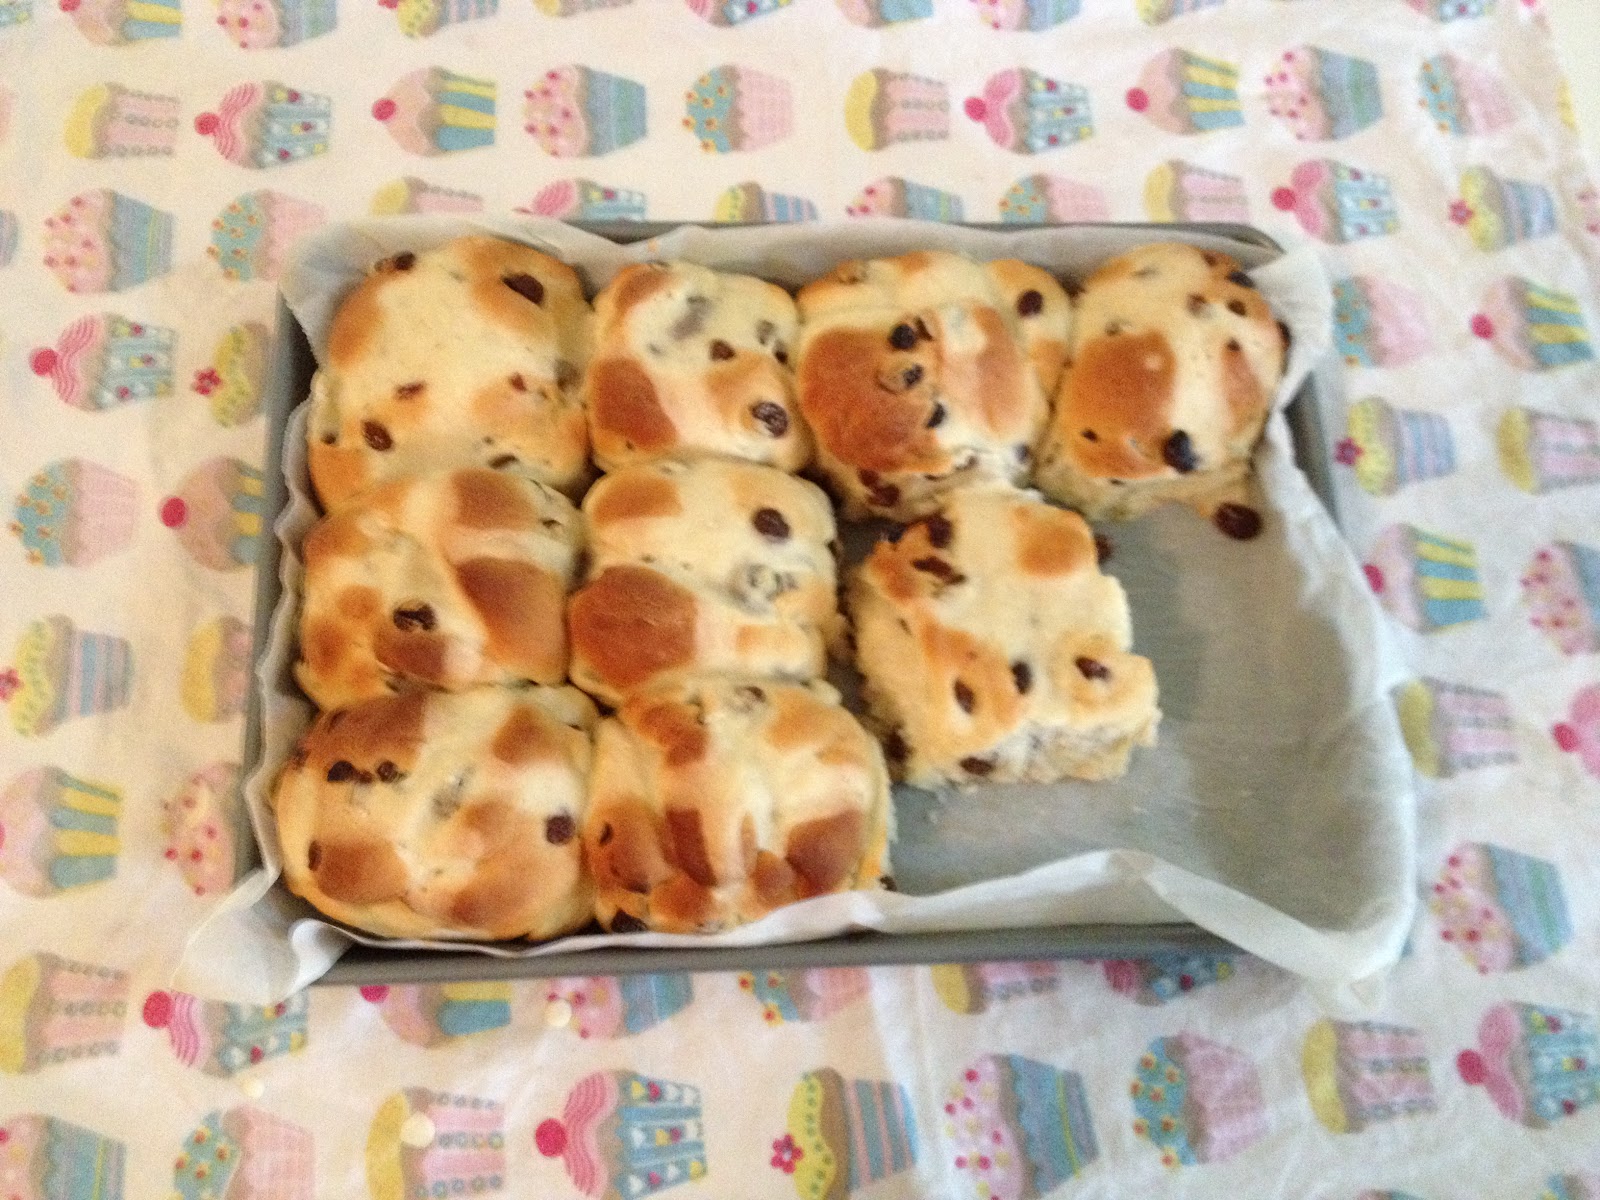
Taking them out of the oven and eating them was even better!
I had the same problem as Sophie with the crosses however. According to my baker brother, it's because I was using the wrong flour. He recommended rice flour. I will have to investigate this next time.
In between waiting for the hot cross buns to rise, I also made Easter fudge. Fudge at Easter is a tradition in my family. My Nana makes it, my Mum makes it and as of this year, I make it. My family prefers a crumbly fudge (which I think is called Scottish tablet ) but my previous attempts to make it have not gone well. It requires a level of precision that I don't seem to have and can easily burn. So instead I make cheat's fudge. I've unfortunately lost the original recipe and I can no longer find it on the internet... luckily it's easy enough to remember.
Add two blocks of chocolate (I used dark chocolate but you can use a mix of milk and dark), a can of condensed milk, about 30 grams of butter and a pinch of salt to a pot.

Stir until melted and combined, then remove from heat. Add tasty extras like macadamias, pistachios, dried fruit, etc. Pour into a lined baking tray. Allow to cool slightly and then refrigerate for at least three hours.

This fudge has a smooth, creamy texture which is quite different from traditional fudge. The results seem like they require a lot more effort then they really do - especially when you dress it up like this.

If you have a sweet tooth, this recipe is definitely worth a try!
Subscribe to:
Posts (Atom)